 ✕
✕
By Justin SabrinaUpdated on March 06, 2023
“Can I record a zoom meeting as a participant? I need to record the content of the meeting. How to record a Zoom meeting without the permission of my host?”
Since the outbreak of COVID-19, Zoom has become a popular social platform and is widely used by many companies and enterprises to work at home, distance teaching and social activities.When conducting a zoom conference, it is necessary to record the entire zoom conference process as an archive. However, only the host and co-hosts can record a Zoom meeting. What if non-hosts want to record Zoom meeting on Windows/Mac without permission of host? Don't worry, this article will help you solve the problem. In addition, you can also record Zoom Meeting with audio on your computer.

CONTENTS
As we all know, Zoom provides two recording options: local recording and cloud recording. Zoom Free can only save the recorded video on the computer, while Zoom Paid have the option to store it in the cloud. If you are the host or get the host permission in the desktop application, you can try the following steps to record and save the Zoom meeting as a host.
Step 1. Log in your Zoom account as a host or co-host.
Step 2. After entering the Zoom meeting room, click the "Record" button at the bottom of the screen.

Tips: You can stop recording at any time during processing.
Step 3. Before recording "Zoom", select the location where you want to save the recording, "Record on Computer" or "Record to the Cloud", and then click the option.
Step 4. After the meeting, Zoom will convert the record to a file so that you can access it on your cloud or computer later.
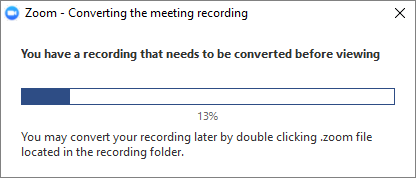
By default, all records will be placed in the "Zoom" folder in the following file path on these devices:
Windows: C:\Users\User Name\Documents\Zoom
Mac: /Users/User Name/Documents/Zoom
Well, you can save Zoom Meeting on computer with the permission of the host, but how to record Zoom Meeting as a participant without permission? Never mind! Some third-party Screen Recorder can help all Zoom users to record a Zoom meeting even if you don’t have the permission. Here we meet UkeySoft Screen Recorder.
UkeySoft Screen Recorder supports both host and participants to record Zoom meeting on Windows and Mac without limit, or edit the the recorded Zoom video for your preference. Besides, it also allows you to record Google Hangouts video calls with high quality. What's more, it can help you record video from YouTube, Vine, Vimeo, Hulu and more with universal video format such as MP4, FLV, AVI, WMV, etc.
Main Features of UkeySoft Screen Recorder:
UkeySoft Screen Recorder is fully compatible with almost any Windows and Mac OS , follow the detailed steps to record Zoom video on your computer by Using UkeySoft Screen Recorder.
Note: Please turn on the Microphone and Webcam option on your Mac/PC, to make sure your sound and face can be recorded as well.
Step 1. Launch UkeySoft Screen Recorder on Computer
Free download and install UkeySoft Screen Recorder on your Mac/Windows, then launch the program. To record a Zoom meeting call, please select "Screen Recorder" option.
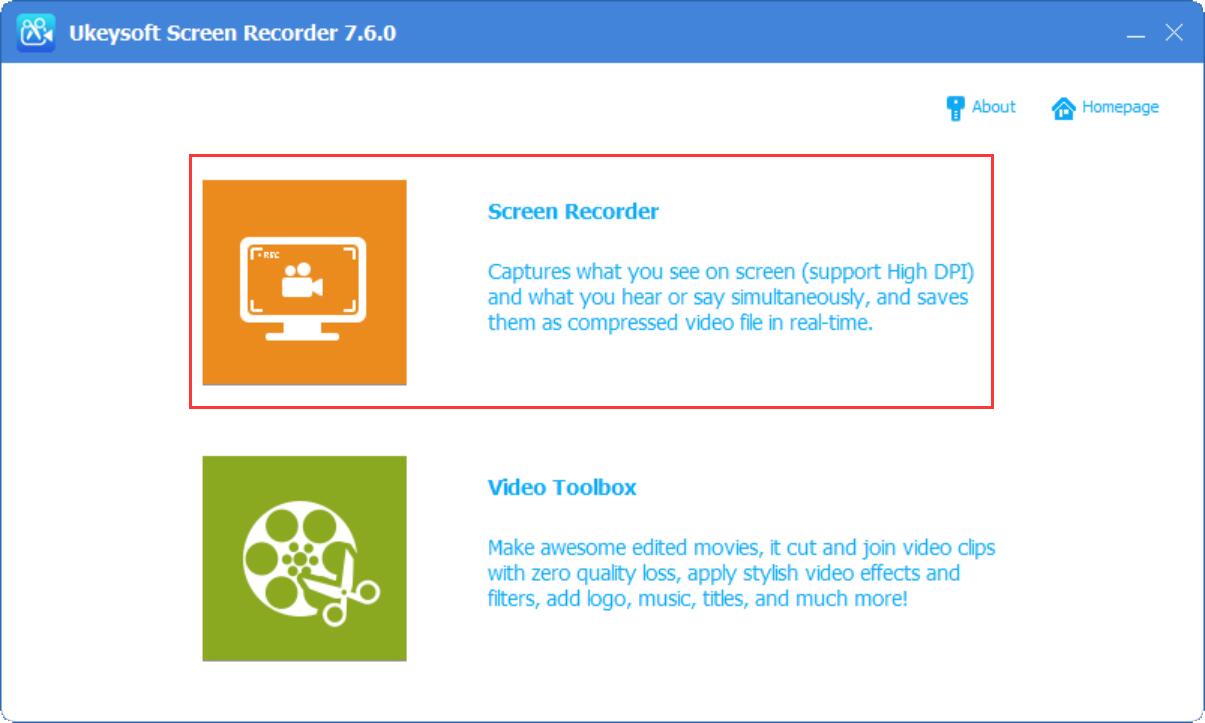
Step 2. Select Computer Sound for Recording Zoom Meetings
In order for your voice to be recorded in the video, please select "Computer sound and microphone" mode before you record the Zoom call.
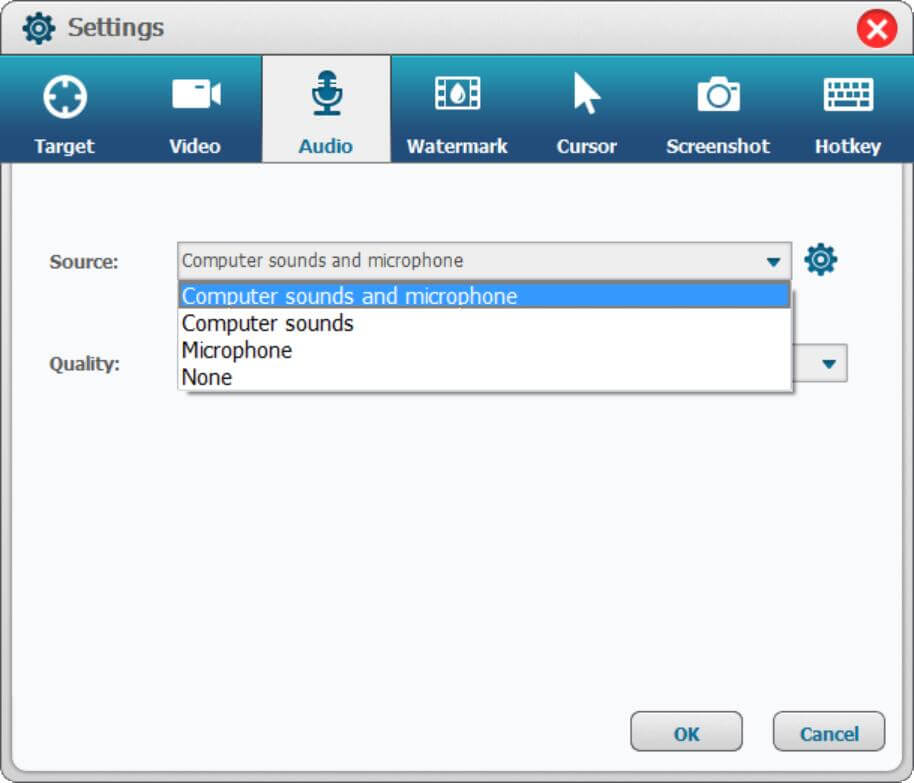
Step 3. Customize Output Setttings for Zoom Calls
Go to "Settings" > "Video", here you can record Zoom Video Calls as MP4, AVI, FLV and WMV, etc.
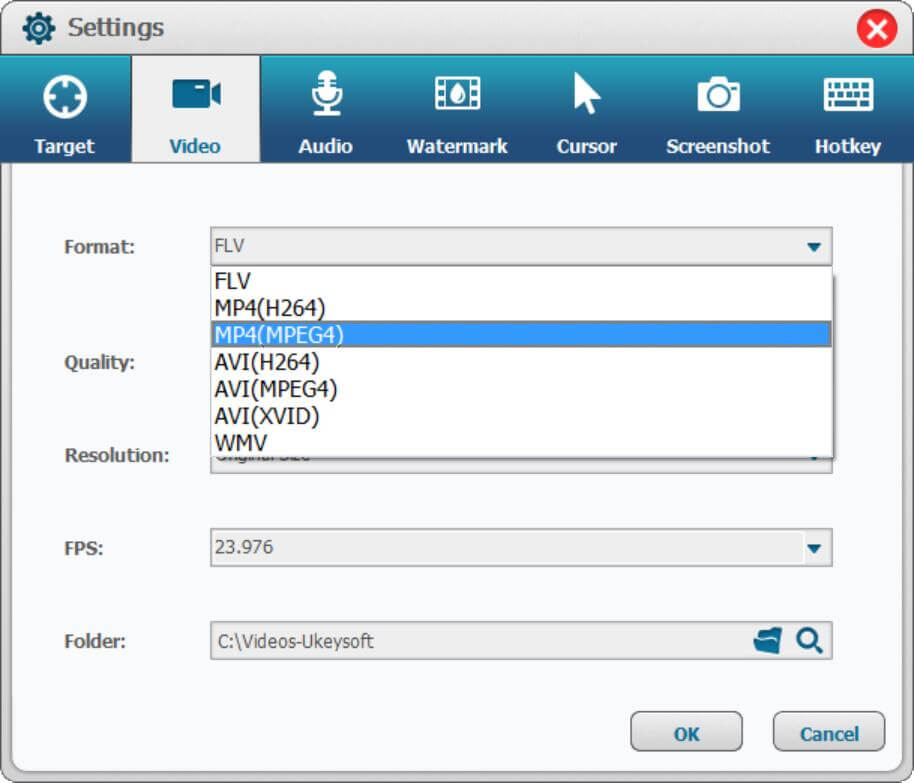
Besides, you can enable "Zoom in while recording" and adjust the scale from 1.5 to 4.0 if necessary.
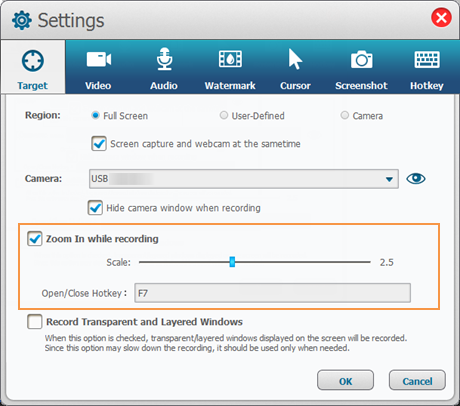
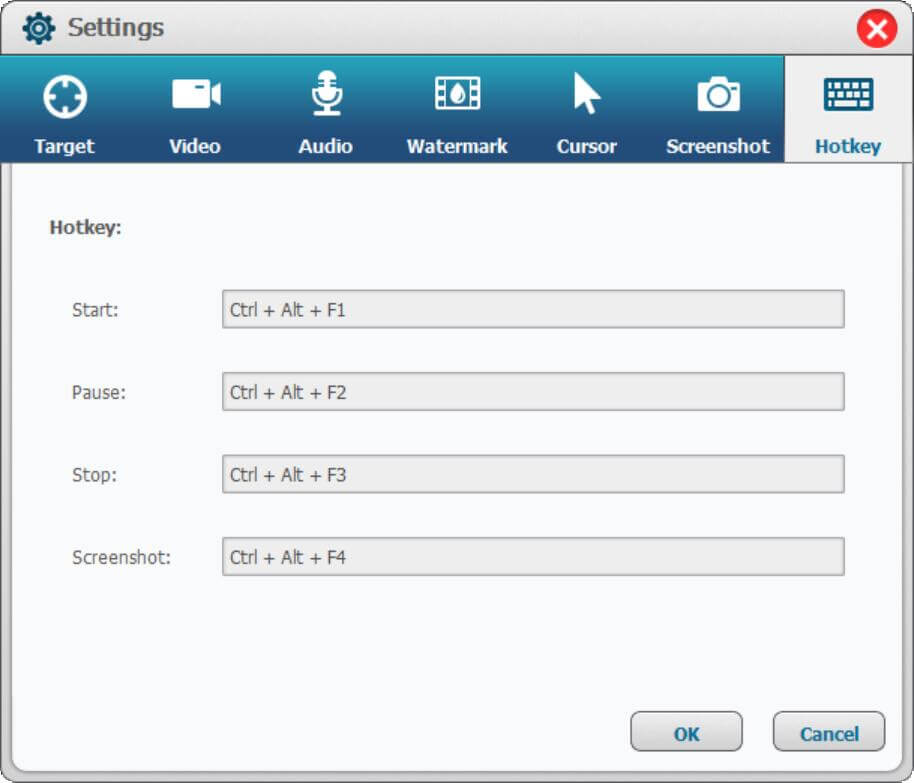
After start video recording, move the cursor to the area you want to zoom in, just click "Hotkey" icon in the top bar to move it, or start, pause or close recording Zoom video.
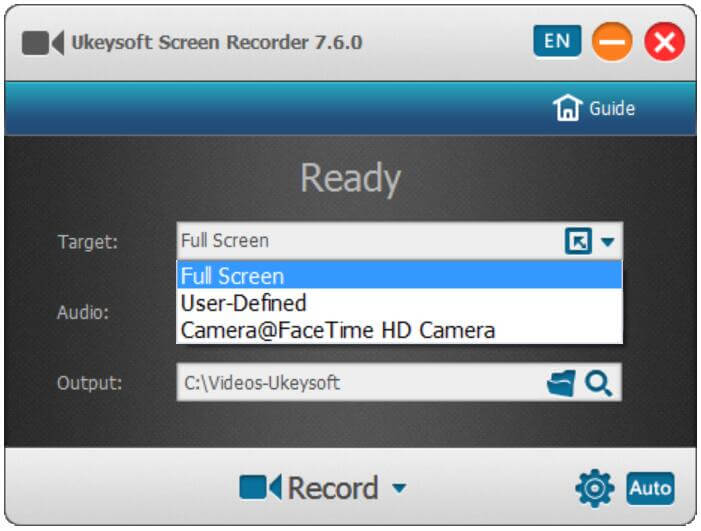
Step 4. Select Recording Area for Zoom Meeting
Go back to the home screen recorder to select the recording area for Zoom Meeting Calls: full screen, specific recording area or camera, to help you capture meetings.
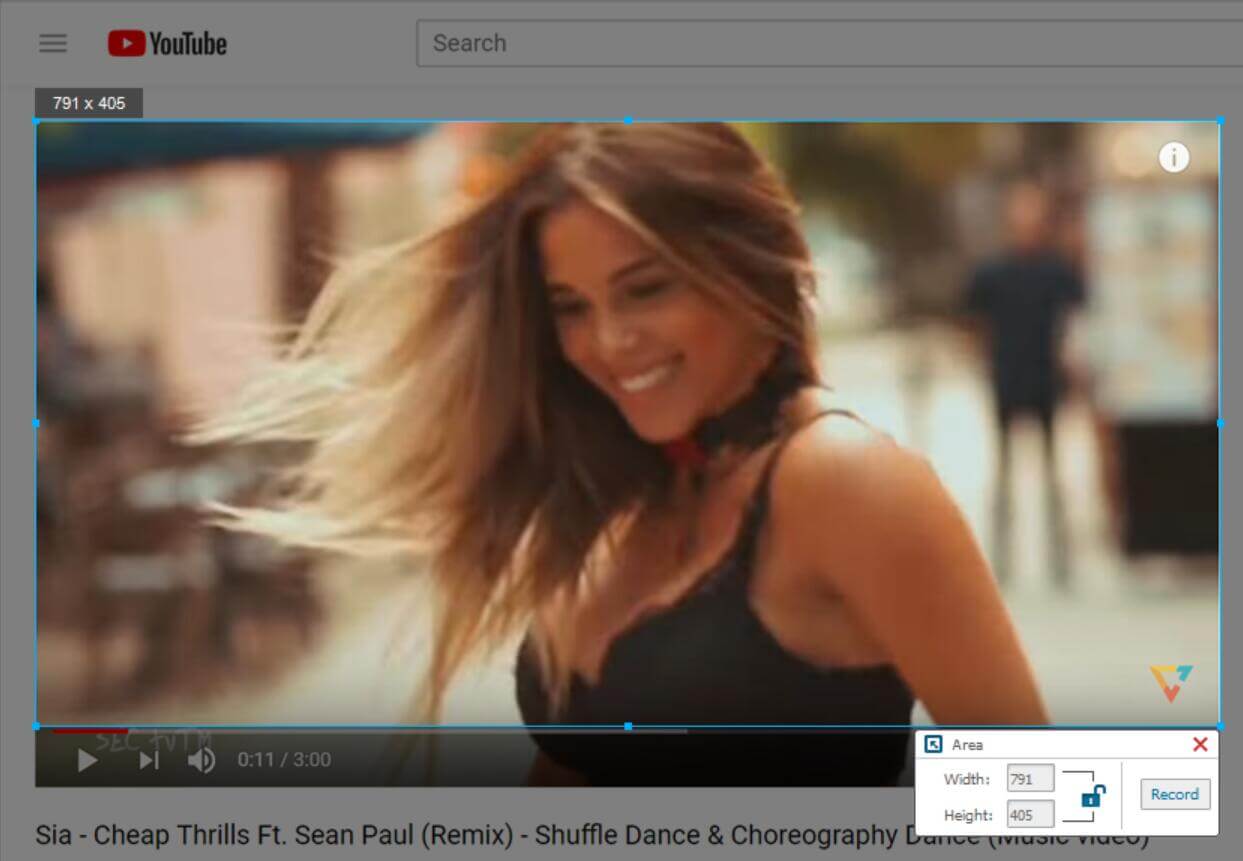
Step 5. Start Recording Zoom Meeting
After the above settings, click “Record” icon to record Zoom video as MP4 right away.
Step 6. Edit Recorded Zoom Meeting
After finishing the recording, you can also edit and modify the conference video by "Video Toolbox" function, such as cutting off the unwanted parts of the video, or adding subtitles or watermarks, music, etc. to the video.
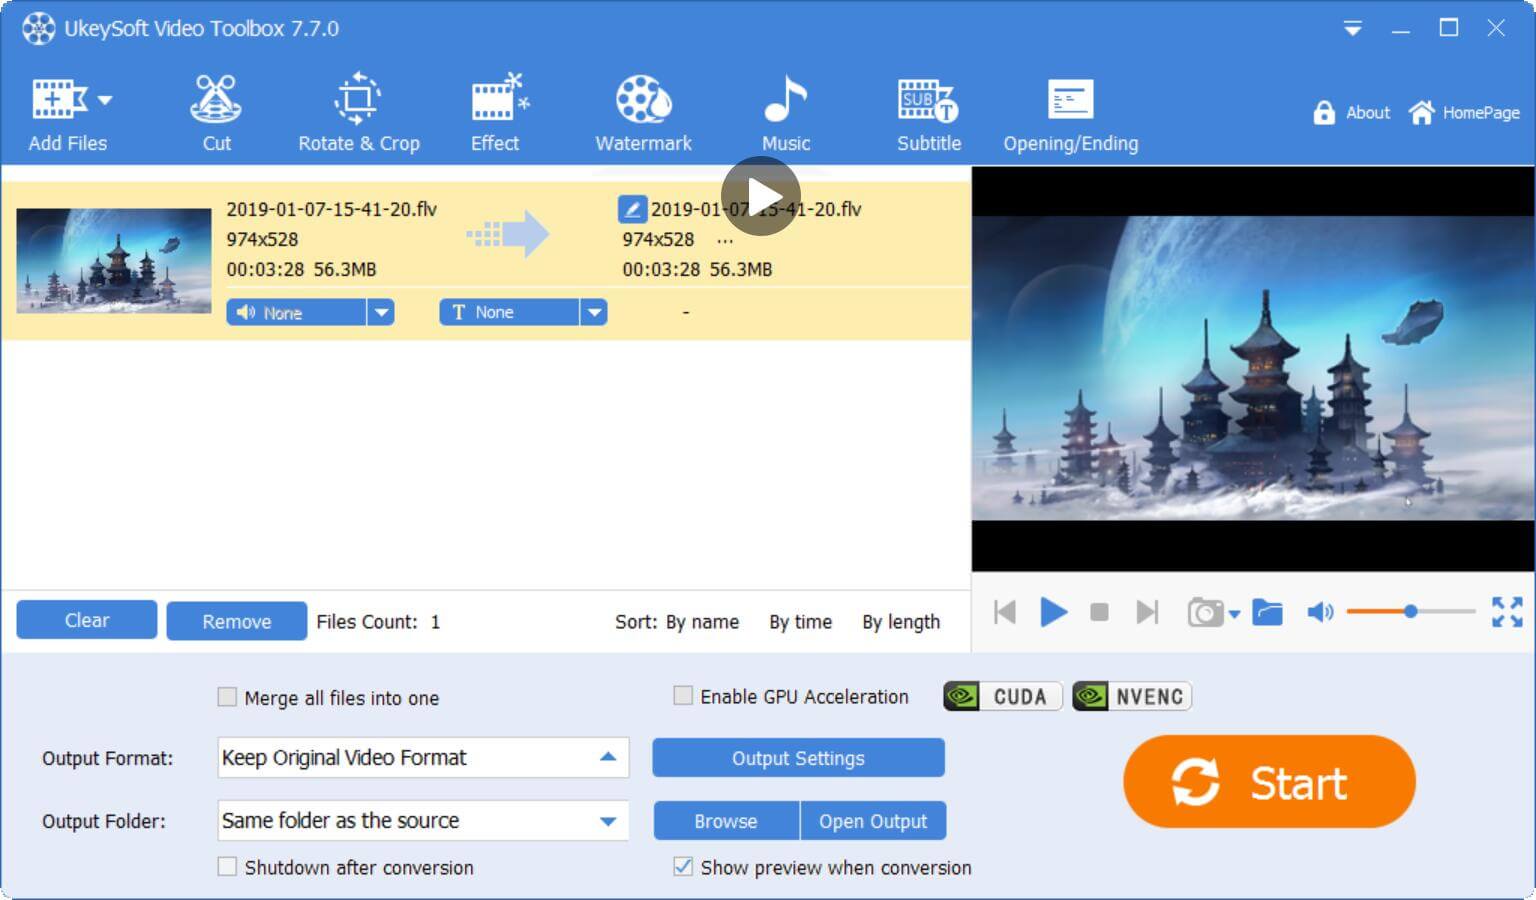
Now you can save the recorded Zoom video on your computer or share it with others who needs to capture important meeting information.
In addition to the UkeySoft introduced above, we also have a very worthwhile professional video recording tool that we would like to recommend to you, that is FonePaw Screen Recorder. As an excellent screen recording software, it supports the recording of Zoom Meeting video content initiated in any form. Even if you enter the meeting as a participant, you can also record the complete meeting content without the permission of the host, and the recorded video The file is stored on your computer.
FonePaw Screen Recorder not only supports simultaneous recording of computer system, microphone, and camera audio and video content, but also allows you to customize the recording area, edit the recording screen in real time, and help you record key points or take notes during the meeting. Special functions such as mouse and keyboard action recording and magnifying glass close-up effect can make the recorded video even more beautiful. The software has no limit on the recording time, no matter how long the meeting is, the original picture quality and audio can be preserved. Surprisingly, FonePaw Screen Recorder also has a built-in timer recording function. You can use it to set up the recording in advance for meetings that are too late to attend. When the time is up, it will automatically record. When you have time, you can review and watch the entire meeting without missing anything. important content.
Key features of FonePaw Screen Recorder:
FonePaw Screen Recorder is also very simple and convenient to use. It supports point-and-click recording mode, and you can easily record Zoom meeting content with just a few clicks of a button, without the need for various complicated operations and host authorization.
Note: If you need to simultaneously record conference audio and local microphone audio, please make sure the speaker and microphone option in the panel is "ON".
Step 1. Install and launch FonePaw Screen Recorder on your computer
Click the link above to install and launch FonePaw on your Mac / Windows computer. Select Video Recording on the recording main panel.

Step 2. Set recording area and volume
You can customize the size of the area to be recorded according to your own needs, and turn on the speaker and microphone to record in turn, and adjust the volume.
ALT:Set recording area and volume

Step 3. Customize video recording and output parameters
If you have any recording setting needs, you can click the menu bar in the upper right corner of the main page, find "Settings" in the drop-down menu, and adjust the corresponding recording settings and output parameters in turn.

In addition, you can also use the super practical function of "Lock Window Recording" to lock the Zoom meeting window for background recording, so that you can exit the recording window for other activities and work during the recording period.

Step 4. Start recording Zoom Meeting video
On the Zoom Meeting meeting page, press the "REC" button on the right side of the page when the meeting starts to start recording. You can add annotations such as text, arrows, or symbols to the meeting screen during the recording process.

Step 5. Finish Zoom Meeting recording
After the Zoom Meeting session is over, press the "Stop" button again at the same recording location to end the recording and go to the preview page, where you can view the recorded conference video and simply trim and edit it.

Of course, it doesn’t matter if you can’t attend the meeting in front of the computer on time. You can click “Task Schedule” > “Add” > “New Task” at the bottom of the recording main panel, and then set the time and duration of the automatic recording you want , click "OK" and the program will automatically start recording at the corresponding time.

You can easily record your Zoom Meeting and save it on your computer in the desired format.
We highly recommend that you use UkeySoft Screen Recorder to record Zoom meetings on Windows and Mac. If you don’t want to record Zoom meetings via third-party, you can try to record Zoom meetings with the built-in screen recording feature on Windows and Mac. The following methods help you easily record Zoom meetings without permission on your computer.
Way 1. Record Zoom Meeting Without Permission on Windows 10 & 11
Windows 10 & 11 have a built-in recording function, Xbox Game Bar. It lets you record most apps, including Zoom. First, install the Xbox Game Bar on Windows, and then use the shortcut "Windows Key + G" to run the software. Finally, open the Zoom conference video to be recorded and click the "Start Recording" button.
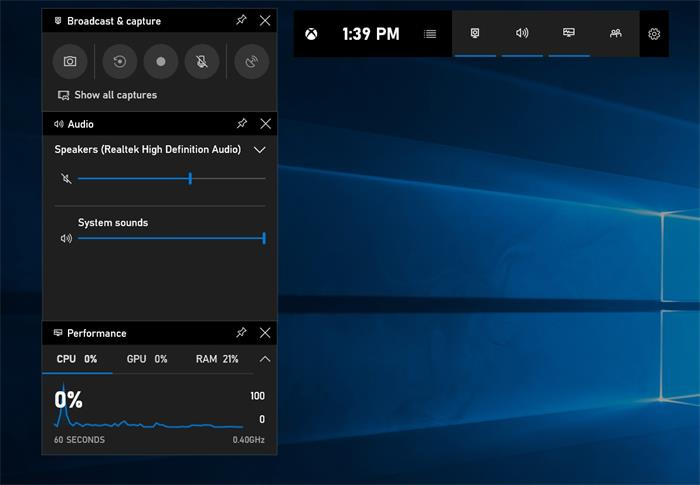
Way 2. Record a Zoom Meeting Without Permissions on Mac
For Mac user, you can use the QuickTime Player. QuickTime is a handy media player that also features screen recording. To record a Zoom meeting in QuickTime Player, go to "File"> "New Screen Recording", then the recorder will be activated and used. When your Zoom meeting starts, click the REC button and QuickTime will record the Zoom meeting audio for you. Please note that the recorded files take up a lot of space.
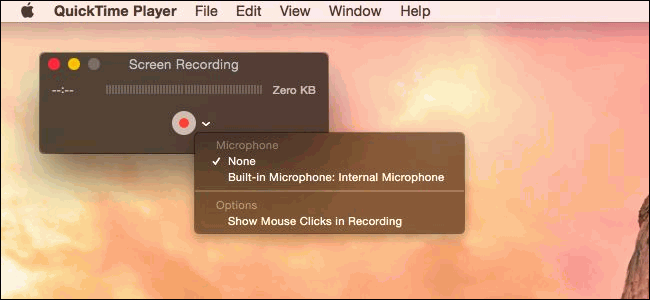
Way 3. Use Zoom Cloud Recording to Record Zoom Meeting
Cloud recording works for all paid Zoom subscribers, whether you are hosts or not. It allows users to record to Zoom cloud or online storage. After the recording is done, you can find your Zoom meeting recordings in Zoom Cloud, which can be downloaded and/or streamed in your browser.

Way 4. Record Zoom Meetings Without Host Permission
Camtasia Recorder also can help you easily capture Zoom meetings and other online meetings, such as Google Hangouts Calls. When you want to record a Zoom meeting, just start the program and click "Rec" to start recording Zoom call audio immediately. Please note that it's not for free.
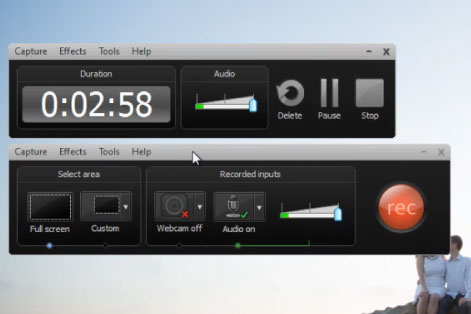
Compared to UkeySoft Screen Recorder, Camtasia Recorder has an older page design, limited functionality and more expensive.
Currently, iOS 12 or higher and the newly launched Android 11 have a built-in screen recording function. Mobile users can use it to record Zoom meeting without permission of host, then move them to your computer. These recorded files can be very large, please make sure there is enough free space on your device to record the entire meeting.
Way 1. Record Zoom Meetings without Permission on iPhone
Step 1. Open your iPhone or iPad(running iOS 12 or later), go to "Settings", scroll down to the "Control Center", click on it. A new window will appear on your screen.
Step 2. It will appear a new window, scroll down till you find the "Screen Recording" option, tap on "+" icon.
Step 3. Once enable the Screen Recording function, swipe up from the bottom edge of any iPhone, then press the "Zoom"(like a circle) on the iPhone icon, and then click "Microphone".
For iPhone X or later, swipe down from the upper right corner of the device screen to turn on the screen recording function and "Microphone". Wait for 3 seconds to start recording.
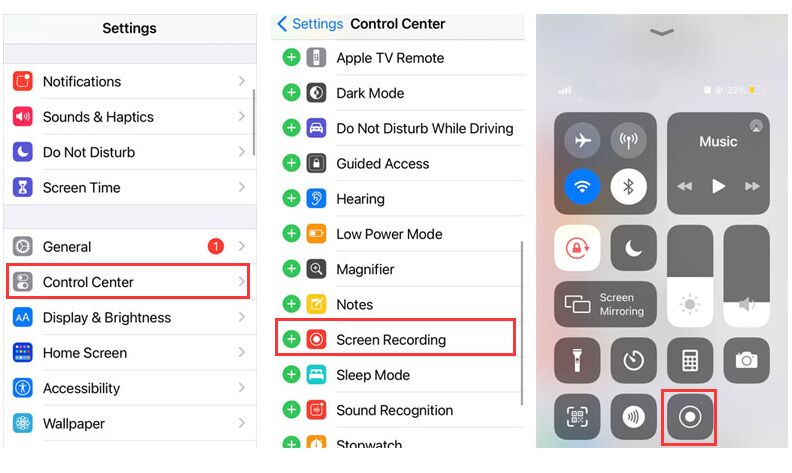
Step 4. Join the Zoom meeting on iPhone. After the meeting is over, repeat step 4 and click the "Zoom"(the icon is shown in red) to stop recording.
Step 5. After that, the Screen recordings get saved on your Camera Roll. You can go to the Photos app to view and trim your recording.
Step 6. Run iTunes app on PC, connect your iPhone with iTunes, and then upload the recorded files to iTunes library. Then you can save the Zoom meeting record on your computer!
Way 2. Record Zoom Meetings without Permission on Android
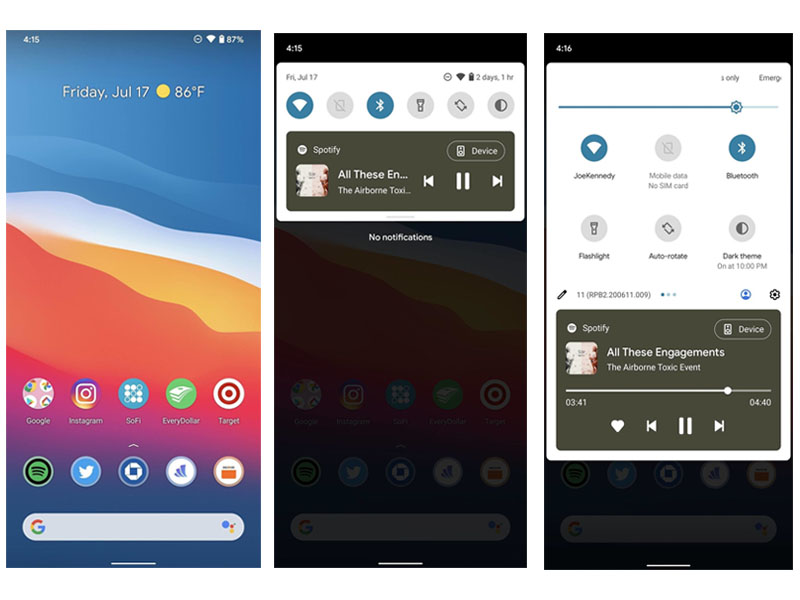
Step 1. Open the screen of Android 11, swipe down from the top of the screen to access the notification panel. Swipe down again to view your Quick Settings.
Step 2. Swipe right on the "Quick Settings" until you see the screen recorder switch.
Step 3. Click "Screen Record". If you want to record audio or display touches on the screen, tap the switch, and confirm whether to use the microphone or device audio to record the audio.
Step 4. Click "Start" to start recording. Wait 3 seconds. Enter your Zoom meeting and start record the Zoom meeting.
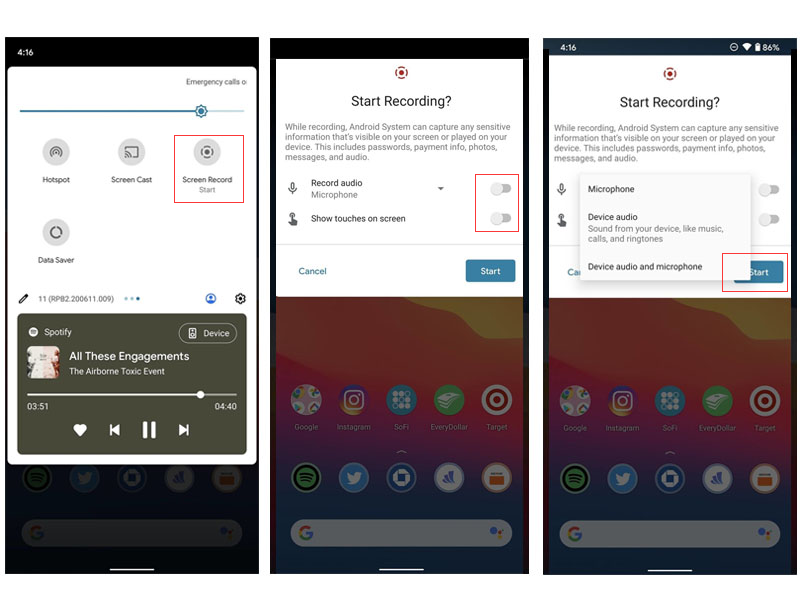
Step 5. When the meeting is over, click the red banner that shows "Tap to stop". After that, the video will be saved to your camera roll, and then you can go to the Photos app to edit and share the recording.
Step 6. Now you can transfer the recorded Zoom meeting files to your computer. Connect your Android with computer via USB cable, then open the Photo folder, copy and paste the recorded files to your computer.
If you get permission from host, it is completely legal to record your Zoom calls. The legality of recording Zoom meetings without permission depends on your country/ region/ state's wiretapping and recording laws.
Zoom will always alert host when you screen record. If you are using a third-party recorder to record a Zoom meeting, it's necessary to keep the law in mind. Otherwise, you may be against the wiretapping and recording laws and face penalties.
Q1: Why can't I record a Zoom meeting?
Answer: The Zoom meetings can only be recorded if you get permission from host. To record Zoom meeting without permission, UkeySoft Screen Recorder is your good helper. It can record every desktop activity with ease.
Q2: Will Zoom Host know if I screen record?
Answer: Yes. Zoom will always notify meeting participants that the meeting is being recorded.
Q3: How to transcribe a Zoom meeting recording?
There are some free Zoom meeting transcription service, just import or upload your Zoom recording to their server, and they do the rest. Also, you can use other professional Zoom transcription software, but most of them are paid.
Q4: How can I record Zoom without permission for free?
Answer: UkeySoft Screen Recorder allows you to record a Zoom meeting without permission, but the free version comes with a watermark. To unlock its features, please get the full version.
Q5: How can I download Zoom recording from shared link?
Answer: Copy and paste the link to the browser. It will navigate to a new page where you can only watch the video. Click the dropdown menu titled 'More' and then select the 'Download' option.
That's all about how to record Zoom meeting without permission on Mac and Windows PC. If you want to freely control the permission to record any online video or online meeting, it is recommended that you use the professional Zoom Meeting Recorder - UkeySoft Screen Recorder. It assists you to record a Zoom meeting on Windows, Mac, laptop, MacBook secretly, no host permission, no watermark, no others knowing. What's more, it can also record online videos, live streaming, gameplay videos, PowerPoint presentation, etc. The built-in video editor lets you cut, add, edit the recorded video freely! Try it now to record meeting in Zoom and capture screen with no restriction.
Prompt: you need to log in before you can comment.
No account yet. Please click here to register.

Enjoy safe & freely digital life.
Utility
Multimedia
Copyright © 2024 UkeySoft Software Inc. All rights reserved.
No comment yet. Say something...