By
ChesterUpdated on February 11, 2025
Summary
Wondering how to use Tidal Live Session? Read this article, we will introduce what Tidal Live Session is all about, and also you will learn the best way to download and share Tidal music to others with a useful tool.
Tidal, a popular music streaming platform, has a cool new feature called Tidal Live Session. Now, you can be your own DJ, creating playlists for friends, family, or anyone on Tidal. It's not just about sharing music; it's about bringing people together. In this article, we'll show you how to use Tidal Live Session to make the most of your music-sharing experience.
CONTENTS
Part 1. What is Tidal Live Session
Tidal Live, formerly known as "DJ" during beta testing, became Tidal Live Session in April 2023. This feature lets subscribers share music, discover new songs, and listen together in real time. It’s a fun and interactive way to make music sharing more social and engaging, whether you’re hosting or joining a session. If you’d like to join and explore Tidal Live Session, here are the key requirements:
- Tidal Live Session has a maximum duration of 3 hours.
- A HiFi or HiFi Plus subscription is mandatory for both initiators and listeners.
- The starter and listener must be located in the same region.
- Paid subscribers in the US and Canada can enjoy Live sessions in either country.
- Please be aware that tracks in Dolby Atmos or Sony 360 Reality format won't be audible during Tidal Live Sessions.
Part 2. How to Use Tidal Live Session
Tidal's Live Session feature offers subscribers a fresh avenue to share music, highlighting emerging artists, creating cultural moments, and adding an interactive touch to daily activities where music plays a role in people's lives. It's important to note that Tidal Live Session is exclusively accessible to HiFi and HiFi Plus subscribers through the Tidal mobile app. Follow the steps below to activate this feature on your mobile device.
How to Enalbe Tidal Live Session
Step 1.
Launch the Tidal app on your device.
Step 2.
Navigate to the 'Settings' menu.
Step 3.
Choose 'My content' in the Account section.
Step 4.
Use the toggle switch for 'Live Session' to activate or deactivate it.
How to Start a Live Session on Tidal
Step 1.
Open the Tidal app on your Android or iOS device.
Step 2.
Log in to your Tidal account using your credentials and play any Tidal song you wish to share.
Step 3.
Head to the 'Live' section located at the top right corner.
Step 4.
Customize your session name by clicking the 'Name your session' button.
Step 5.
Locate the 'Go to Live' button on the page and initiate the live session by clicking on it.
Step 6.
Once the live session has begun, you can share it with others or leave comments on the session or Tidal track.
Part 3. Best Way to Share Tidal Music to Others[Hot]
While Tidal Live Session offers an excellent way to share music, it's important to note that this feature is exclusive to active subscriptions. Once the subscription is canceled or expires, enjoying music with your loved ones becomes challenging. Additionally, if the person you shared with doesn't have a Tidal premium plan, they won't be able to join the Live Session, resulting in a similar limitation. Therefore, we'd like to present an alternative solution to enable you to share Tidal music without these restrictions.
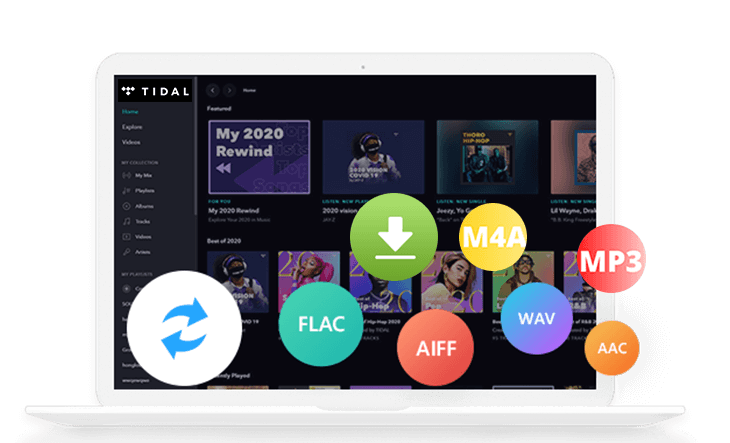
To share Tidal songs with others, the most effective method involves downloading the tracks as local files. Serving as a robust Tidal music downloader, Ukeysoft Tidal Music Converter allows you to download and convert Tidal tracks to various formats such as MP3, M4A, AAC, FLAC, WAV, and AIFF without any loss in audio quality. Utilizing advanced decryption technology, UkeySoft Tidal Music Converter can also remove DRM from Tidal, enabling you to save all Tidal songs to your computer locally. This way, sharing Tidal MP3 songs becomes effortless and hassle-free.
UkeySoft Tidal Music Converter
- Download tracks, playlists, albums from Tidal.
- Convert Tidal music to MP3, M4A, FLAC AAC. WAV and AIFF.
- Support batch download at 10x faster speed.
- Preserve 100% audio quality and ID3 tags.
- Save and share Tidal music freely.
- Equipped built-in web player, no need for the Tidal app.
- Fully compatible with Windows & Mac OS.
Guide: How to Download Tidal Music and Share Freely
First of all, downloaded and installed UkeySoft Tidal Music Converter on your Windows or Mac computer. Then follow the Steps below.
Step 1. Launch UkeySoft and Log in Tidal Account
Launch UkeySoft Tidal Music Converter on your computer. To log in to your Tidal account, click on the "Log In" button located at the top right corner of the interface.
![login tidal account]()
Note
It's important to note that you can log in using any type of Tidal account, be it Tidal Free, Tidal HiFi, or Tidal HiFi Plus.
Step 2. Customize Output File
To customize your output file settings, go to the top right corner of the program interface and select the 'Gear' icon. Within this menu, you can select your desired output format from options such as MP3, M4A, AAC, FLAC, WAV, and AIFF. Furthermore, you can adjust output quality, set the output path, define the output filename, and make additional preferences according to your preferences.
![output format]()
Step 3. Add Tidal Songs/Albums/Playlists
Choose the specific songs, albums, or playlists you want to download from Tidal Music. Simply click the red '+' button on the right side of the interface to add them to the conversion list.
![add tidal music]()
By default, all songs are automatically chosen. If there are specific songs you wish to exclude, you can easily unselect them.
![select tidal track]()
Step 4. Start Converting Tidal Music to Computer
To start converting Tidal music songs on your computer, just click the "Convert" button. This will kick off the conversion process.
![convert tidal music to mp3]()
Step 5. View the Local Files
Once the conversion is complete, you can go to the "History" tab to see a list of all the content you've downloaded from Tidal Music. To open your output files, click on the blue folder icon, enabling you to review and explore the obtained files.
![get mp3 music files]()
The Tidal files are now stored on your desktop for offline playback. You can also enjoy Tidal music offline on various devices or freely share it with others.
Part 4. FAQs about Tidal Live Session
Q1. Can I Use Tidal Live Sessions on Any Device?
No, it's only available on the Tidal mobile app.
Q2. Can I Use Tidal Live Sessions Outside My Registered Country?
No, it works only in the country where your account is registered.
Q3. What’s the Difference Between Tidal Live Sessions and Spotify Group Sessions?
Tidal Live Sessions let one person pick the songs, while Spotify Group Sessions allow everyone to control playback. Tidal's feature is only for HiFi and HiFi Plus users, while Spotify’s is open to all.
Q4. Are There Issues with Tidal Live Sessions?
Some users report explicit content playing during Live Sessions, and there's no way to block or report it yet.
Conclusion
Tidal Live Session makes sharing music easy with just a few taps, letting you enjoy music with others in real time. However, there are some limits, like needing a subscription and everyone being in the same country. To get around this, you can download Tidal songs using UkeySoft Tidal Music Converter. Then, you can share your favorite tracks with anyone, anywhere, anytime.
Tip: System Requirements:
Windows 7 or later on 64bit required

Tidal Music Converter

Chester has always had great enthusiasm for writing, programming and web development. He likes writing about software and technology, his works are featured on some tech blogs or forums like Tom's Hardware, CNET, etc.


Comments are off!