By Justin SabrinaUpdated on September 02, 2021
iOS 14 downgrading or upgrading gets stuck on recovery mode/DFU mode/Apple Logo? In this article we will show you how to resolve iOS 14 stuck on a boot loop or stuck in recovery mode or Apple logo issue instantly.
In fact, iOS stuck issues often occur and we are not surprised that iOS 14 stuck issues occur when you upgrade or downgrade iOS 14. But how to fix iOS 14 stuck on recovery mode, boot loop, Apple logo to normal?
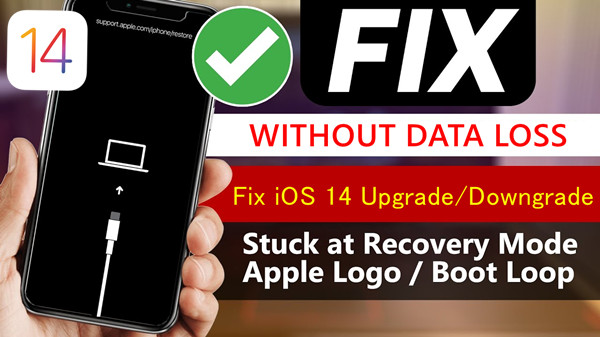
After upgrading to iOS 14, some users find that their iPhone runs slowly and some applications are not compatible with iOS 14. When they tried to return, but iPhone got stuck in recovery mode/boot loop screen/Apple logo/black screen during the iOS 14 to iOS 13 downgrade process. Or, iPhone stuck in recovery mode/DFU mode/Apple logo/frozen screen/boot loop screen/disabled screen, etc. while doing the iOS 14 upgrade. In either case, the iOS 14 stuck issue is something you don't want to see otherwise you may be at risk of data loss. In this user guide, we have brought some methods to quickly fix iOS 14 upgrade or downgrade stuck in the boot loop or recovery mode or stuck on Apple logo issues.
CONTENTS
Part 1: Manually Fix iOS 14 Stuck in Boot Loop/Recovery Mode/Apple Logo
Sometimes, your iOS device may get bricked during iOS 14 downgrading or upgrading due to software crashes, software bugs, software conflicts or incorrect operations. In this case, you may be able to manually fix iOS 14 stuck on recovery mode/Apple logo/boot loop issues. Here are 3 tips you should try.
Tip 1. Force Restart the Stuck iOS Device
Force restarting a stuck iPhone/iPad device is one of the official methods recommended by Apple's official website to fix iOS errors. It may not work 100% but the data is safe. Whether the iPhone is stuck in recovery mode, DFU mode, boot loop or Apple logo, you should try to force restart the device. Let’s learn how to force restart an iOS device.
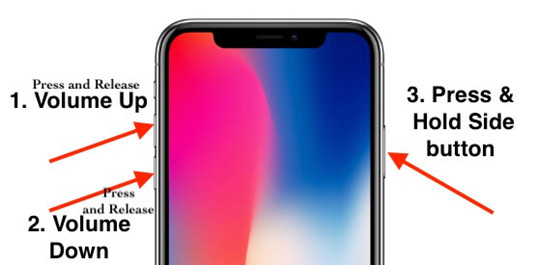
iPhone 8, iPhone X, and Higher:
Firstly press and release the “Volume Up” button. Then, press and release the “Volume Down” button. Finally, press and hold the “Side” button until you see the Apple logo appear on the screen.
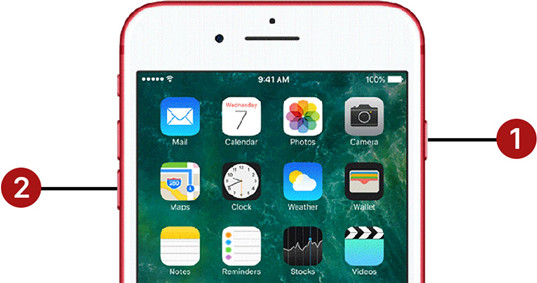
iPhone 7 and iPhone 7 Plus:
Press and hold the “Volume Down” and the “Side” button together. Continue holding until the Apple logo appears on the screen.
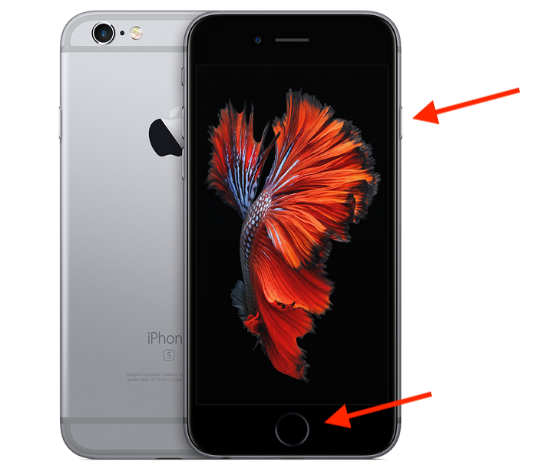
iPhone 6s and Older:
For iPhone 5s, SE, 6, 6 Plus, 6s, or 6s Plus, please press and hold the “Home” button along with the “Sleep/Wake” button until you see the Apple logo appear on the screen.
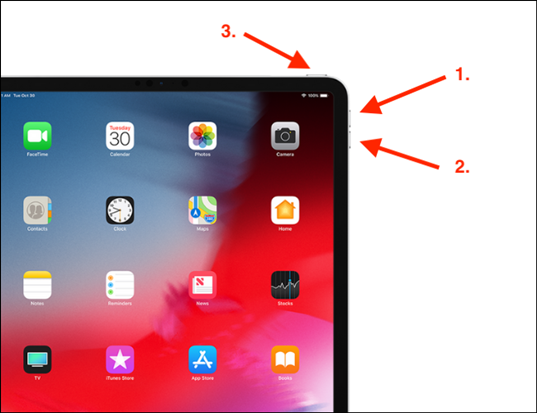
iPads without the Home Button:
Firstly press and release the “Volume Up” button, then press and release the “Volume Down” button, and then press and hold the “Top” button until you see the Apple logo appear on the screen.
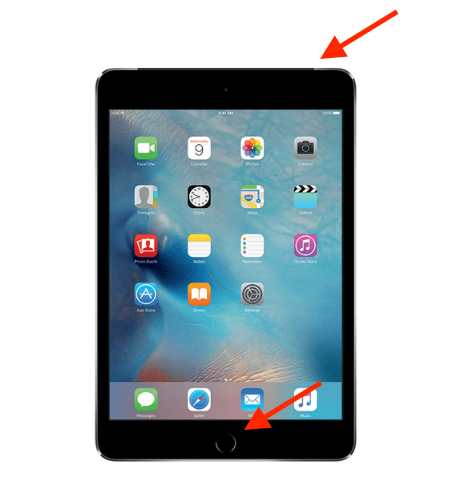
iPads with a Home Button:
Press and hold both the “Home” button and the “Top/Power/Sleep or Wake” buttons at the same time until you see the Apple logo on the screen.
Tip 2. Manually Exit Recovery Mode
If your iPhone/iPad is stuck in recovery mode after upgrading or downgrading iOS 14, you can try to exit iPhone recovery mode manually. Please follow the steps below:
step 1. Update and launch iTunes on your computer, then connect iPhone to the computer.
Step 2. Press and hold the "Sleep/Wake" button on the device until you see the Apple logo screen. Keep pressing and the "Connect to iTunes" screen will appear.
Step 3. It is time to disconnect /iPhone/iPad from the computer. Then turn off your iOS device. (For iPhone 8/8 Plus or earlier devices, directly press and hold the Power button to turn off the iPhone. For Phone X or higher, press and hold the power button and Volume Up/Volume Down button to turn off the iPhone.)
Step 4. Restart the iOS device, you will see the lock screen which means you have exited the recovery mode. Enter the screen password and you can now access the device normally.
Tip 3. Manually Exit DFU Mode
Similarly, you can also manually exit DFU mode due to iOS 14 upgrade or iOS 14 downgrade stuck. Follow the steps below to try to get rid of iPhone/iPad stuck in DFU mode.
Step 1. Update iTunes to the latest version and launch it, then connect the stuck iOS device with the computer.
Step 2. For iPhone 8 and later, press the Volume Up button and quickly release it. Then press the Volume Down button and quickly release it and then press and hold the "Side" button until the slider appears on the screen.
For iPhone 7 and iPhone 7 Plus, press the Volume Down button and the "Sleep" button at the same time until the device restarts.
For iPhone 6 and earlier models, press and hold the "Sleep/Wake" button, and then press the "Home" button at the same time to display the Apple logo.
Now, please check if the iPhone/iPad device has exited DFU mode. If the above manual method does not work, you can seek a professional iOS system recovery tool. Please keep on reading.
Part 2: Fix iOS 14 Stuck Issues with Best iOS Repair Tool (Data Safe)
UkeySoft FoneFix - iOS System Recovery software is one of the professional iOS system repair tools, suitable for repairing 50+ iOS/iPadOS/tvOS to normal without any data loss. It is divided into standard mode and advanced mode and one-key enter/exit recovery mode. As the best iOS repair tool, if you encounter iPhone stuck in recovery mode/boot loop/Apple logo/DFU mode/iPhone keeps restarting due to iOS 14/13/12 upgrade, iOS 14/13/12 downgrade, jailbroken iPhone, it is recommended that you use UkeySoft FoneFix to restore iPhone/iPad/iPod touch/Apple TV to normal.
Main Features:
- Best iOS system recovery to fix 50+ iOS/iPadOS/tvOS issues.
- Easily fix iPhone stuck in recovery mode/DFU mode/Apple logo/boot loop, etc.
- Support Standard Mode and Advanced Mode to repair iOS issues.
- Enter & exit recovery mode with one click.
- Your data will be preserved perfectly after fixing.
- Factory reset iPhone/iPad without iTunes/password.
- Fully compatible with iOS 14 and iPhone 11/XS/XR/X, etc.
4 Easy Steps to Fix iOS 14 Stuck Issues with Losing Data
Step 1. Launch UkeySoft FoneFix - iOS System Recovery
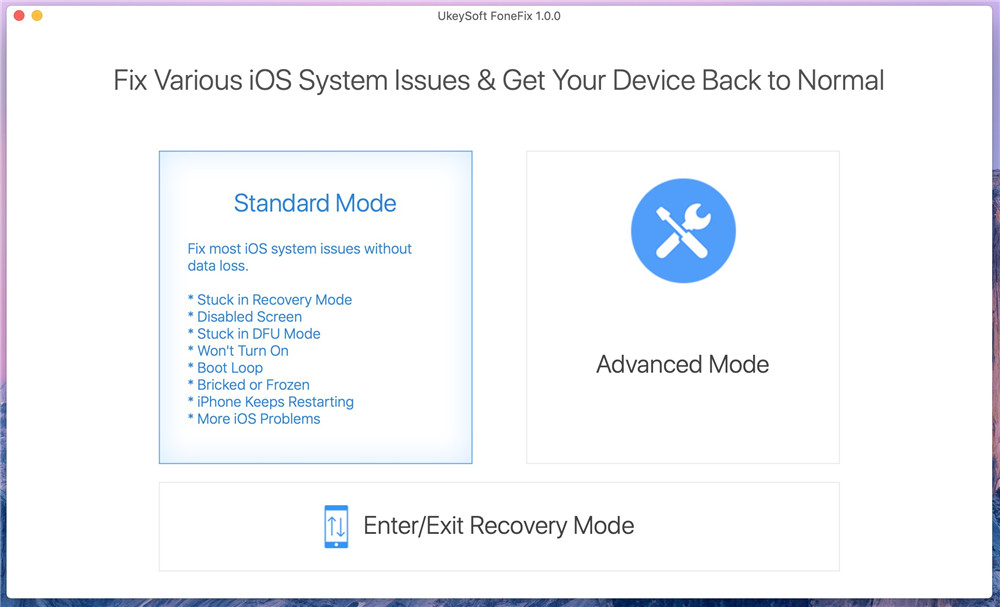
Download this UkeySoft FoneFix - iOS System Recovery tool to Windows or Mac, and connect your iOS 14 stuck device to the computer via a USB cable. You'll see the interface below. Select "Standard Mode" to repair iOS 14 stuck on recovery mode/Apple logo/boot loop, etc. without data loss.
Step 2. Put iPhone into Recovery Mode
Connect your iPhone and follow the steps on the screen to put your iPhone into recovery mode. This step can be omitted in case your iPhone is stuck in recovery mode.
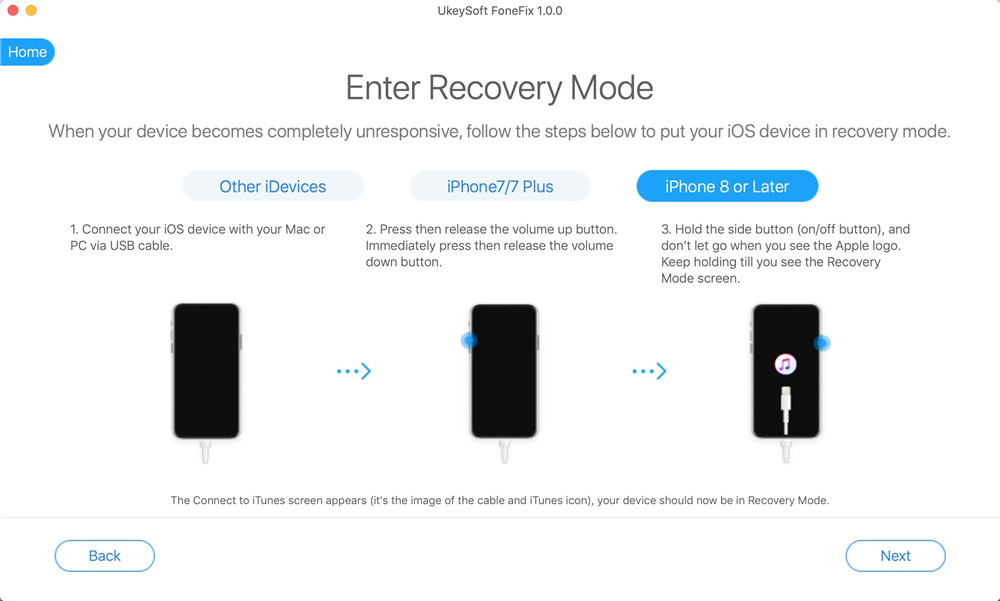
If your iPhone is disabled/locked, you can bypass the password and factory reset your iPhone by choosing "Advanced Mode". Under the Advanced Mode, your device can be fixed in minutes and can work normally, but all data will be completely cleaned up.
Step 3. Download Firmware Package
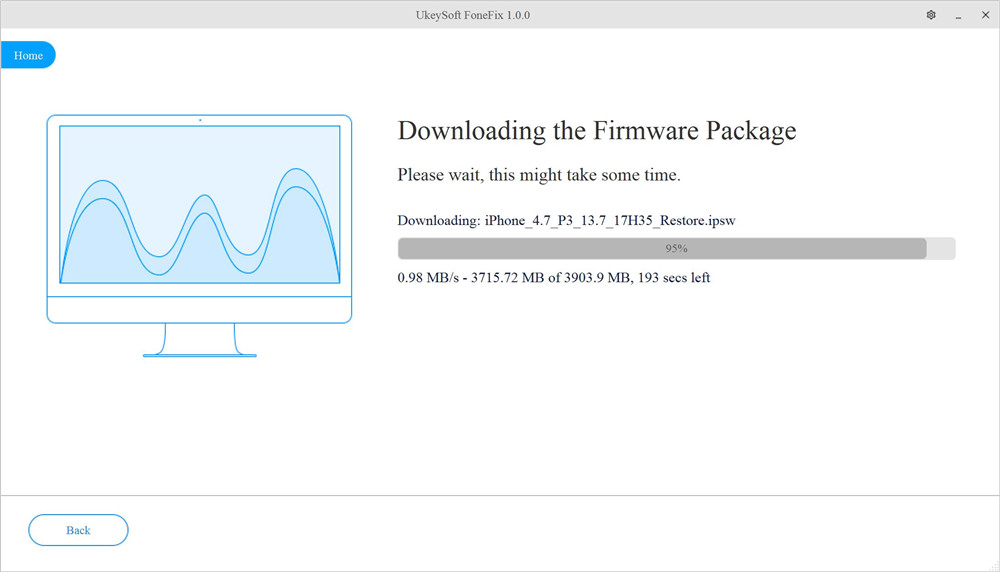
When the program checks that your device is in recovery mode, it will guide you to download the correct firmware package. Click the "Download" button to download it online, or you can import the iOS firmware locally should you have it already.
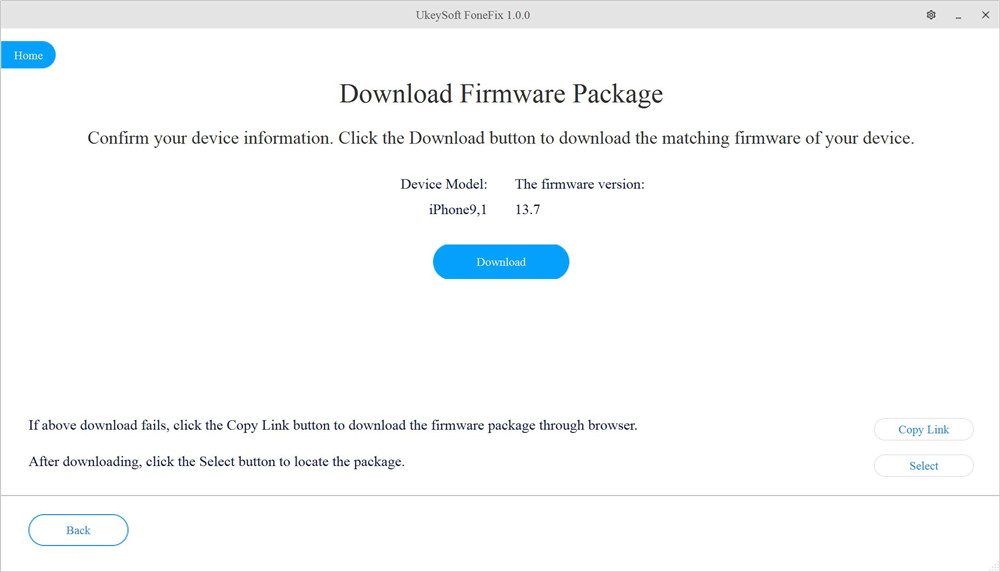
Follow the on-screen display, UkeySoft FoneFix is downloading the firmware package for your iPhone.
Step 4. Fix iOS 14 Stuck on Issues Instantly
When the firmware package download is finished, you will be ready to start the repair process. Click the "Start" button fix iOS 14 stuck on Apple logo/recovery mode/boot loop and more.
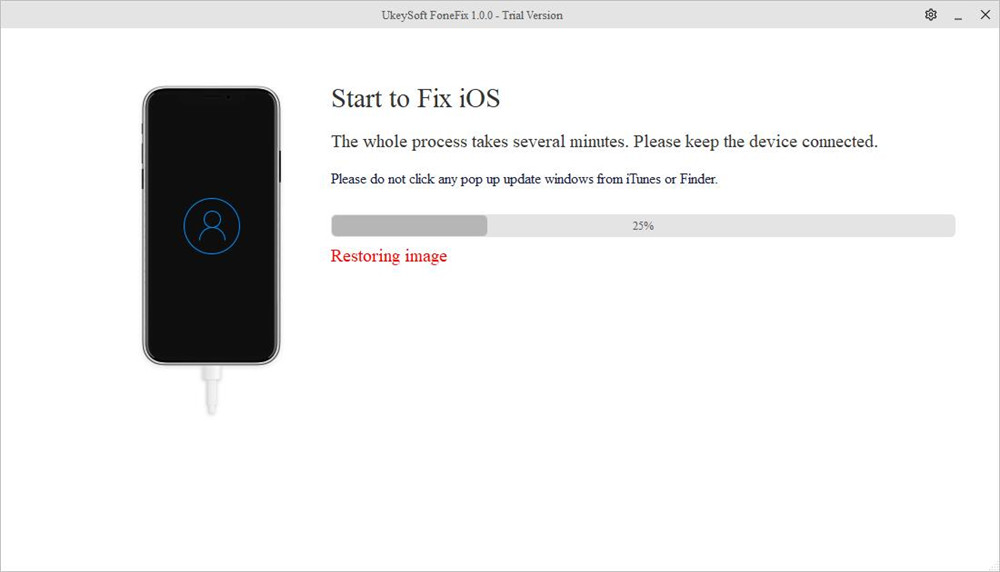
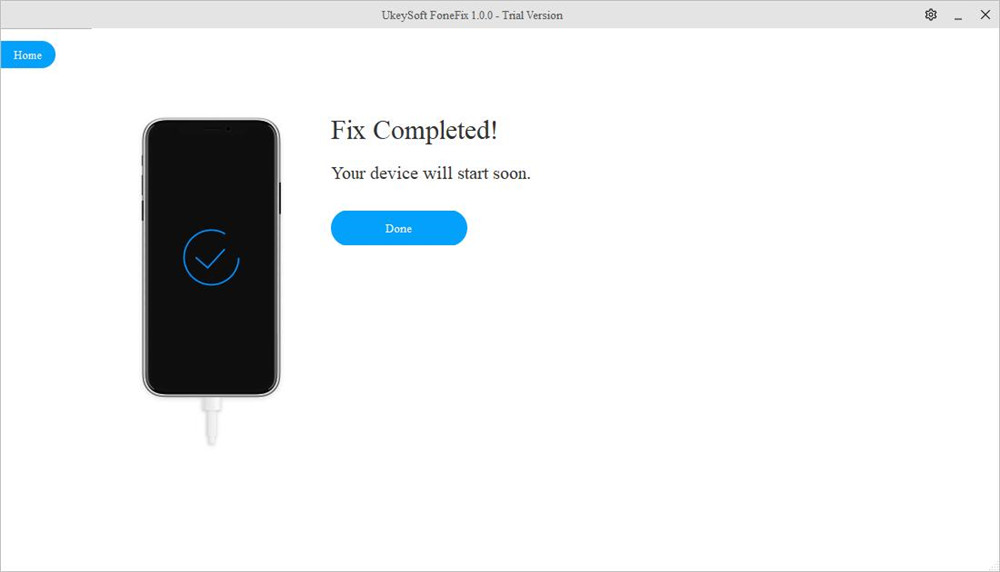
When the repair is done, the device will reboot. Now, your iPhone will be back to the normal mode, and the boot loop/recovery mode/Apple logo/black screen of death/headphone mode must have gone. Fortunately, all data stays in place.
Video Guide: How to Fix iPhone Stuck on Recovery Mode
Part 3: Fix iOS 14 Stuck on Recovery Mode/Boot Loop with iTunes Restore (Data Loss)
If you don’t care about your data, you can rely on iTunes restore to fix various stuck issues in iOS 14, including recovery mode, Apple logo, DFU mode, boot loop, black screen/white screen/blue screen, disabled screen, headphone mode, keep restarting, iPhone won't turn on, Apple TV issues, etc. Please follow the steps below:
Step 1. Connect the stuck iOS 14 device with the computer, then update and launch iTunes.
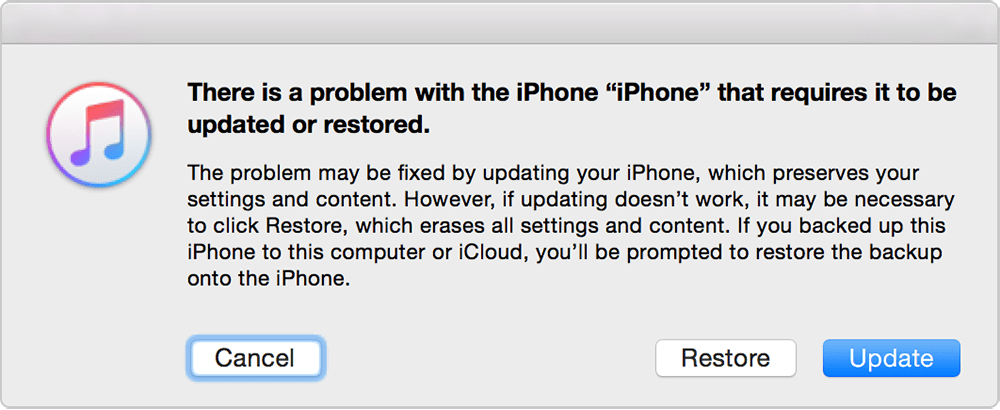
Step 2. If your device is in recovery mode or DFU mode, iTunes will automatically detect the problematic device and pop up a small window asking you to update or restore the device.
Step 3. Click Restore to start fixing iPhone stuck on recovery mode/DFU mode with iTunes.
Conclusion
In summary, if you encounter iOS 14 stuck issues, there are many ways to try. First, you can try to hard reset your device manually. Of course, UkeySoft FoneFix is the most recommended iOS system repair tool, specifically used to solve various iOS system problems on iPhone / iPad / iPod touch / Apple TV. Moreover, UkeySoft FoneFix supports the latest iOS 14 and new iPhone models.

No comment yet. Say something...